

How to Change Car Headlight Bulbs
- Vehicle Maintenance
- PEAK
- July 16, 2024
Follow this step-by-step guide to learn how to change your car headlights.
Modern headlights have a lifespan of up to 30,000 hours, but even the most resilient bulbs eventually burn out. Knowing how to change a headlight bulb can save you a costly and time-consuming trip to your local auto technician. More importantly, it will help you avoid the serious safety risks that arise from limited nighttime visibility.
The exact process you'll follow — and the difficulty level — depend on your vehicle's year, make, and model. Despite these variations, the general process is similar no matter what you drive. This step-by-step guide explains how to change a headlight bulb.
Before You Begin
You'll need to do three things prior to changing your car headlights:
Consult Your Owner's Manual
Your owner's manual will identify the size and type of replacement headlight bulb you'll need. It may also provide vehicle-specific tips or details about the bulb replacement process, which could make the task quicker and easier.
If you can't find your owner's manual, search online for a replacement. Virtually every automaker in the world offers downloadable replacement manuals free of charge.
Failing that, you can also use PEAK Auto's Find Your Vehicle feature on our automotive lighting landing page. It will automatically generate a list of PEAK headlight bulbs that match your car or truck.
Buy Replacement Bulbs
Once you've identified the type of replacement bulb you need, you can start shopping. Consider these Department of Transportation-approved PEAK products:
- Power Vision Gold Headlights: Engineered for elite performance, these premium headlights cast a deep, bright white light that illuminates more of the road than standard bulbs.
- Ultra Vision LED Fog Lamps: These long-lasting fog lights cast a brilliant white light that boosts safety in low-visibility driving conditions.
- Classic Vision: These popular halogen bulb headlights deliver excellent reliability and a long lifespan for an economical price.
As a general rule of thumb, it's best to replace both of your headlights at the same time. If one bulb has burned out, the other probably isn't far behind and you might as well take care of it now.
Also, check how your vehicle's low and high beams are configured before you shop. Most use separate bulbs for low and high beams, but some use the same bulb for both. Research this in advance to make sure you buy the right number of replacement bulbs.
Round Up Your Tools and Equipment
With your new bulbs ready to go, it's time to gather your tools and equipment. You'll need:
- Safety gloves
- Socket, ratchet, and screwdriver sets
- Needle-nose pliers
- Pocket screwdriver or clip removal tool
A magnetic light or headlamp might also come in handy, especially if you're working somewhere with limited overhead lighting.
What's Involved
For most modern vehicles, changing car headlights is a relatively easy job that amateurs with limited DIY experience can complete in about 20–30 minutes.
For extra guidance, try searching for instructional videos that are specific to your car's year, make, and model, and show you exactly how to change a headlight bulb in your car. If you find one, you can refer to it as you work. It'll likely make things easier.
As a last note, remember that the process described here only covers how to replace a headlight bulb that's burned out. If your headlight lenses are fogged over or cloudy, or if your headlights have gone out because of physical damage to your vehicle's front end, you'll probably need to replace the entire headlight housing. That's a tricky job best left to experienced DIYers or professional technicians.
How to Replace a Headlight Bulb: 7 Steps to Success
In most passenger vehicles, you'll follow a similar set of basic steps. Some details may vary, as noted in the step descriptions below.
1. Turn off your vehicle
You'll be working with electrical equipment, so turn off your vehicle and let it cool down. If your ignition uses a key, remove the key.
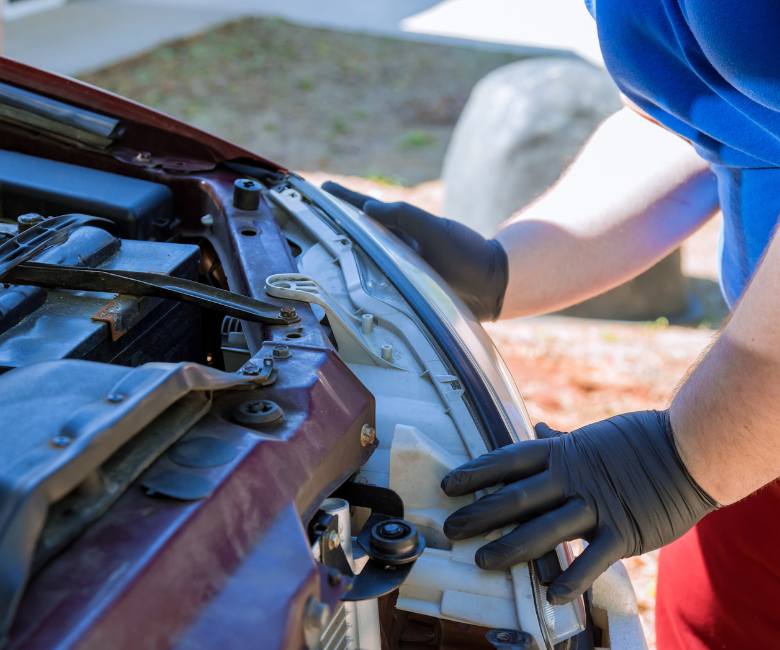
2. Access your headlights
Put on your safety gloves, open the hood, and locate the headlight housing. This step is where you're most likely to encounter variations on the standard process. In most cases, the housing will be easy to both identify and access. However, you might need to do a bit of searching around the front of your vehicle to find it.
If you have an easy-access housing, unscrew the assembly cover and open the assembly. Position the open assembly so you can easily reach the bulbs inside.
Some headlight assemblies must be accessed through the vehicle's wheel well. This setup is a little more complicated, but still manageable. You'll need a screwdriver or socket and ratchet, along with a prying tool. Here's what to do:
- Use the screwdriver or socket to remove the screws or fasteners from your wheel well cover.
- Gently pry open the wheel well to access your headlights.
- After you complete the headlight change, close the wheel well and replace the fasteners to secure the cover.
3. Release the headlight clip
Some bulb plugs are held in place by a clip. Use your pocket screwdriver to loosen and release the clip. They can be stiff sometimes, especially in older vehicles, so you might need a little elbow grease to complete this step.
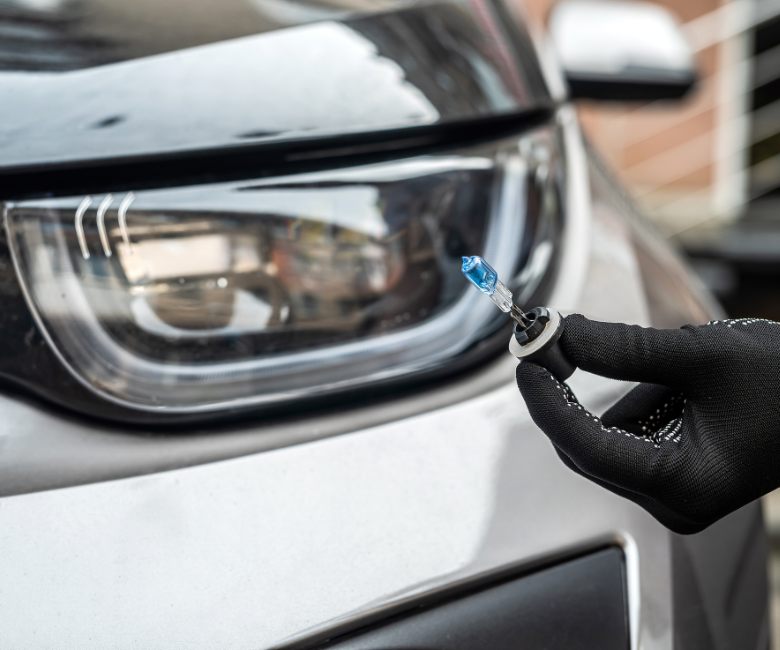
4. Remove the old bulb
Grab onto your old headlight's bulb casing and turn it counterclockwise. Continue until it loosens as the tabs on your bulb and its fitting line up. Then, use a steady forward motion to pull it straight out.
5. Install your replacement car headlights
If your car uses separate bulbs for low and high beams, make sure your new headlights are placed correctly. Low beams usually go on the outside, while high beams are usually positioned on the inside.
For an easy way to double-check your low- and high-beam bulbs on the fly, look at the part number on your replacement headlights. Low beams usually have higher part numbers.
When you're ready to proceed:
- Align the tab on your replacement headlight with the tab on the corresponding fitting.
- Hold it straight and steady, then turn the headlight bulb in a clockwise direction.
- Stop when you hear the new bulb click into place. In most cars, this will happen after about a quarter of a clockwise turn.
Do both of your low beams first, then both of your high beams (or vice-versa). This will help you keep everything straight as you work.
6. Test your new lights
Turn on your headlights and test both the low and high beams. If everything works, you're done!
One Last Note
If you get stuck at any step, it's best not to force things. Should this happen, undo your work by reversing each step. Then, take your vehicle to your preferred service center to have a technician complete the change for you.
For more headlight options, be sure to explore PEAK's website. You'll find an industry-leading lineup of capsule headlights, exterior miniature bulbs, and sealed beams to choose from.
