

How To Do an Antifreeze Coolant Flush and Fill
- Vehicle Maintenance
- PEAK
- October 15, 2024
Follow this breakdown for how to flush and fill your coolant.
Every so often, you need to drain, inspect, and replace the antifreeze or coolant fluid in your car's engine cooling system. This routine maintenance task is commonly known as a "flush and fill."
Most people have a technician do their flush and fill. According to Kelley Blue Book data from June 2023, this usually costs around $200–$250 at a dealership. To save money, or if you just like doing things yourself, you can do a DIY flush and fill instead.
The job doesn't require advanced technical knowledge. However, you need to be able to:
- Operate and secure a jack
- Remove and replace a vehicle's underpanel
- Locate your radiator drain valve
- Use a fluid line for your coolant reservoir
If you're up to the task, follow these step-by-step instructions supplemented by expert insights from the OWI Product Team and car enthusiast Emily Reeves of Flying Sparks Garage YouTube fame.
Prepare your equipment and supplies
Here's what you'll need:
- PEAK Original Equipment Technology antifreeze coolant
- Drain pan with a capacity of 4 gallons or more
- Fluid line for a coolant reservoir
- Two jacks
- Personal protective equipment (PPE): chemical-resistant gloves, close-fitting eye protection, respirator, and impermeable long-sleeve clothing
Always work in a well-lit, well-ventilated area with lots of space to move around, such as your driveway during daylight hours.
Choose the right antifreeze
"Look for claims around compatibility," the Team says in explaining what to consider when shopping for antifreeze. "That means a product that's either specific to your year, make, and model, or a claim that calls out universal compatibility."
Emily adds, "PEAK has an all makes, all models coolant, and if you get that, you'll be all set." Universal formulas eliminate guesswork, so they're a great fall-back option if you have any doubts about compatibility.
The Team also has another important piece of advice: "Be cognizant of whether you're buying a concentrated or ready-to-use (RTU) product." Antifreeze and coolant are functionally interchangeable terms, and both come in concentrated or RTU forms.
RTU antifreeze coolants are pre-diluted, usually in a 50/50 ratio. If you buy a concentrate, you'll need to dilute it yourself before adding it to your vehicle. Most vehicles take a 50/50 ratio, but your owner's manual will specify the precise dilution ratio range your car can accept.
"Avoid guessing at the dilution ratios," The Team advises. "If you use a concentrate, pre-dilute it before pouring it in. Sometimes it's easier to buy a 50/50 blend, because there's no guesswork that way."
Flush and fill, step by step
You'll follow eight main steps to complete your DIY coolant flush and fill:
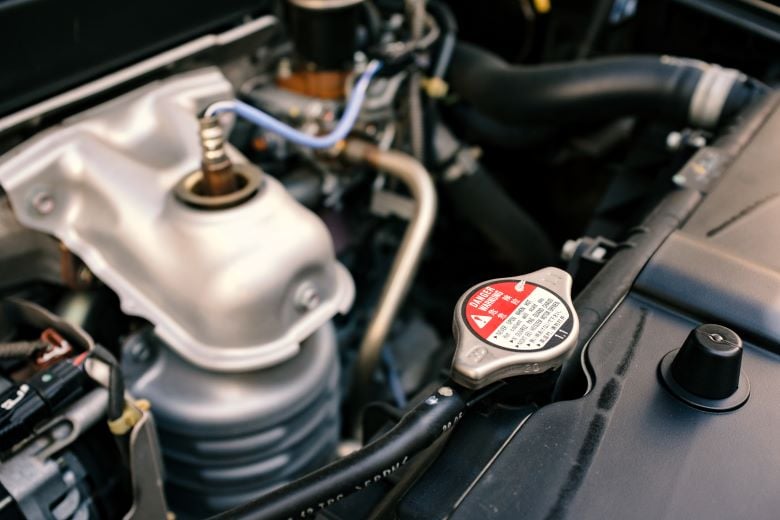
Locate your radiator cap and reservoir
Most modern vehicles place the radiator cap directly on the fluid reservoir. In older vehicles, a pressurized cap is normally located directly on the radiator. If you can't find your cap, your owner's manual will tell you exactly where it is.
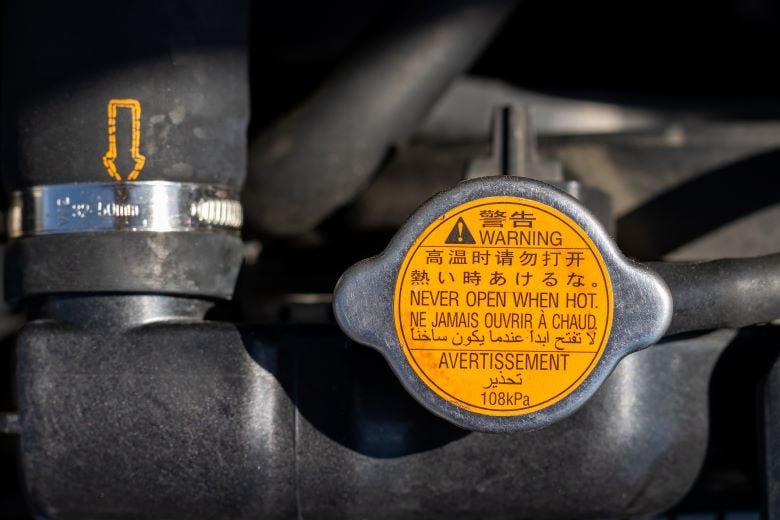
Whether your car is older or newer, always wait until the engine is completely cool before opening the radiator cap. Warm and hot engines can cause dangerous fluid ejections when you open the cap — especially if the cap is pressurized.
Remove the cap to open the reservoir, and place it somewhere it won't get misidentified or lost.
Elevate your vehicle
Place a jack (with a jack stand) on each side of your vehicle. Use both jacks to elevate the front end of your vehicle.
Follow these tips:
- Park your car on level ground, activate the parking brake, and use wheel chocks to secure the rear wheels.
- Use the lifting points near your rear wheels to elevate the front end of your car.
- With your vehicle elevated, lock the jack in place according to manufacturer's instructions using its pin, screw, or pawl.
Remove the vehicle's underpanel
To access your radiator's drain valve, you may need to remove the underpanel or undertray that protects your vehicle's undercarriage. They're usually secured by a few simple plastic fasteners, which are easy to remove and replace.
If you haven't already done so, put on your PPE before continuing.
Open your radiator drain valve and flush your coolant
Locate your drain valve (or drain cock) and check its rear side for a wingnut. Slip your fluid line over the drain valve collar and position its bottom end over your drain pan.
With your drain pan in place, loosen the wingnut, open the drain valve, and drain your coolant until the reservoir is empty.
Inspect your coolant
If you notice any particles, rust, or other debris in the coolant you drained, it's a sign that your engine cooling system might need more intensive professional service. You can complete your flush and fill, but when you're done, take your vehicle in and have a technician check for more serious potential problems.
Prepare your car for a coolant refill
Close your drain valve and re-secure the wingnut. Then, fill the reservoir with distilled or bottled water. (Tap water also works, but it's best to use higher-quality water if possible.)
Next, run your vehicle with the heat on high for 10–15 minutes. Then, drain the water from the reservoir with the same method you used to flush your coolant.
Repeat this process two to three times, until the water comes out clear.
Fill your system with new coolant
Refill your coolant reservoir with properly diluted antifreeze. Your reservoir will have an "F" marking (for "full"). Stop filling when your coolant levels reach this line.
Then, run your car for another 10–15 minutes with the heat on high to expel any bubbles that may have formed in your coolant fluid. "Be sure you get all that water and coolant pushed through and get those air pockets out," Emily says. "Otherwise, you could end up with an overheating problem."
Once that's done, replace your radiator cap.
Recycle your used coolant
Using a funnel, return the used coolant from the drain pan to an empty antifreeze bottle. You can use the same bottle your new coolant came in.
Then, bring the used coolant to a local automotive service center or hazardous waste recycling facility for safe disposal.
Looking for a video tutorial?
If you prefer video instructions, this PEAK Auto tutorial explains how to flush your engine cooling system and how to add coolant to your car afterwards. You can also watch Emily's video on the same topic if you'd like a more in-depth treatment (with some extra entertainment value to boot!).
Get PEAK performance from your antifreeze coolant
PEAK offers one of the most complete antifreeze and coolant lineups on the market, including everything from all-purpose products to advanced, specialized formulations like high-performance PEAK Titanium.
"We have formulas that can get poured in over anything, and we have formulas that are very specific if that's what you'd prefer," the OWI Product Team says. Those specific formulas include products specially engineered for environmental friendliness and North American, European, or Asian vehicles.
